Cleaning a dental chair is not the same as wiping an office sofa. Leather upholstery faces saliva, disinfectant residue, glove powder, hair products, and repeated patient contact. Small mistakes can leave dull patches, sticky surfaces, or cracked seams. This guide introduces seven practical ways to clean leather upholstery on a dental chair while protecting comfort, hygiene, and material life.
Infection-control specialist Dr. John Molinari has emphasized, “Effective cleaning must be balanced with protection of the equipment’s surfaces.” That balance matters. A product strong enough for certain clinical contaminants may still damage coated leather or synthetic upholstery. Always check the chair manufacturer’s care instructions before testing a cleaner. Then remove visible debris, use a soft cloth, and avoid soaking stitched areas. Gentle pressure works better than aggressive scrubbing.
The seven methods will cover routine dust removal, prompt spot cleaning, compatible disinfectants, controlled moisture, seam care, conditioning, and regular inspection. Each method has a clear purpose. Some take less than a minute. That helps busy practices maintain consistency between patients. A clean microfiber cloth should glide across the seat without leaving lint. Pay attention to the headrest, arm supports, adjustment buttons, and lower side panels. These areas often collect unnoticed residue.
There is an uncomfortable truth here: perfect cleaning is difficult during a crowded clinical day. Staff may rush. A disinfectant may remain too long. A promising “universal” product may quietly weaken the finish. Therefore, test products on a hidden area first, record approved products, and review the upholstery regularly. Clean leather should look even, feel dry, and remain free from cracking—not merely appear shiny.
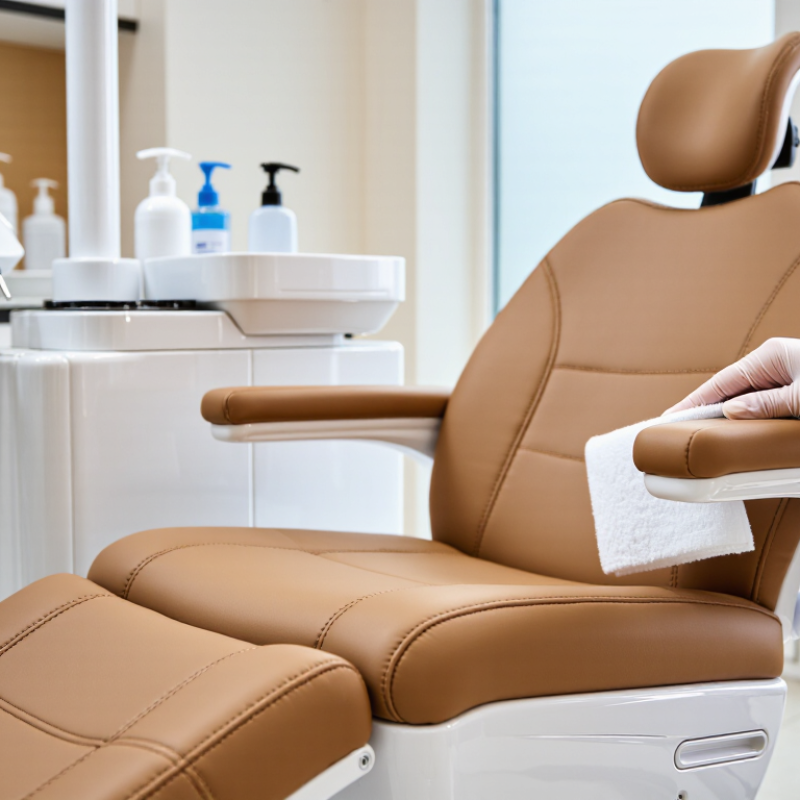
7 Best Ways to Clean Leather Dental Chair Upholstery?
Identify the leather type before touching the surface. Genuine leather, coated leather, and synthetic upholstery react differently to moisture and chemicals. Check the chair’s care label or technical manual. If neither is available, test a hidden area first. Small mistakes can leave dull patches, swelling, or color transfer.
Use a soft microfiber cloth, lukewarm water, and a pH-neutral cleaner approved for the upholstery. Avoid alcohol, chlorine, abrasive powders, and strong solvents. They may remove protective coatings. Keep the cloth damp, not wet. Water trapped in seams can weaken stitching and create unpleasant odors. A simple rule helps: less liquid, more control.
The CDC’s 2016 dental infection-control guidance recommends cleaning and disinfecting clinical contact surfaces after every patient, unless protective barriers are used. It also advises following the surface manufacturer’s instructions. OSHA’s Bloodborne Pathogens Standard supports using appropriate disinfectants for contaminated surfaces. However, a disinfectant suitable for hard equipment may damage leather. That distinction is easy to overlook. Wipe visible debris first, apply the approved solution to the cloth, and follow its contact time. Do not scrub aggressively. Dry the upholstery immediately, especially around hinges and edge piping. I have found that rushed cleaning often causes more damage than careful cleaning. When uncertainty remains, pause and request the upholstery supplier’s written compatibility guidance.
| Step | Cleaning Method | Recommended Procedure | Important Safety Guidance | |
|---|---|---|---|---|
| 1 | Identify the Leather Type |
|
Check whether the upholstery is genuine finished leather, coated leather, polyurethane-coated material, or vinyl. Use the manufacturer’s care instructions when available, and test any cleaning method on an inconspicuous area first. |
Do not guess Different surfaces can react differently to water, solvents, disinfectants, and conditioners. |
| 2 | Remove Loose Dust and Debris |
|
Wipe or gently vacuum seams, creases, hinges, and the area around the headrest and armrests before applying liquid cleaner. | Avoid stiff brushes and strong suction, which may scratch or pull at coated surfaces and stitched areas. |
| 3 | Use a Mild Surface Cleaner |
|
Apply the cleaner to the cloth rather than directly onto the chair. Clean small sections using gentle, overlapping strokes, then remove residue with a separate lightly damp cloth. |
Use minimal moisture Do not saturate seams, perforations, controls, or foam-filled areas. |
| 4 | Clean Body-Fluid or Organic Spills Promptly |
|
Put on gloves, blot the spill without rubbing, remove visible soil, and apply a disinfectant that is specifically approved for the chair’s upholstery. Follow the product’s stated contact time, then wipe away residue if instructed. |
Follow contact time Never mix disinfectants. Confirm compatibility because repeated exposure to harsh chemicals can damage leather coatings. |
| 5 | Treat Stains Without Abrasion |
|
Blot fresh stains from the outside toward the center. For older marks, use only a compatible cleaner and repeat light applications instead of scrubbing aggressively. | Do not use bleach, acetone, nail-polish remover, abrasive powders, or rough scouring pads unless the upholstery manufacturer explicitly permits them. |
| 6 | Dry the Upholstery Thoroughly |
|
Gently blot away remaining moisture and leave the chair in a well-ventilated area. Keep the chair dry before placing covers or returning it to normal clinical use. | Avoid hair dryers, heat guns, radiators, and direct intense sunlight, which may dry, warp, fade, or weaken the upholstery. |
| 7 | Condition and Inspect the Surface |
|
For genuine finished leather only, apply a small amount of compatible conditioner if the care instructions allow it. Buff away excess product, then inspect stitching, seams, cracks, peeling, and discoloration. |
Conditioner is not universal Do not use oily products on vinyl or polyurethane-coated upholstery unless specifically approved. Report damaged surfaces for repair or replacement. |
Check the care label or technical manual. Genuine, coated, and synthetic leather react differently. If uncertain, test a hidden area. Small mistakes can create dull patches or color transfer.
Use a soft microfiber cloth, lukewarm water, and an approved pH-neutral cleaner. Keep the cloth damp, not wet. Less liquid helps.
Avoid alcohol, chlorine, abrasive powders, and strong solvents. They can dry the finish, weaken stitching, or cause discoloration. Stronger is not always better.
Blot spills immediately with an absorbent towel. Do not rub. Rubbing spreads contamination across seams and nearby upholstery.
Follow the upholstery instructions and the disinfectant’s required contact time. Apply the solution to the cloth, not directly onto the chair. Keep the surface visibly wet during that period.
Clean and disinfect them after every patient, unless suitable protective barriers are used. Use fresh cloths between patients. This reduces hidden cross-contamination.
Use a soft cotton swab around buttons and stitching. Avoid sharp tools. Dry these areas carefully because trapped water can weaken seams.
Dry the surface immediately, especially near hinges and edge piping. Check for tackiness, cracks, or faded patches. I sometimes inspect twice. Busy routines can hide small damage.
How to clean leather upholstery on a dental chair begins with identifying the upholstery type and checking the manufacturer’s care recommendations. Prepare soft microfiber cloths, clean water, and a mild leather-safe cleaner, avoiding harsh chemicals, abrasive pads, and excessive moisture. First, remove dust, hair, and loose debris gently so particles do not scratch the surface. Then wipe routine dirt with a lightly dampened cloth and a diluted cleaning solution, working in small sections and avoiding seams, controls, and openings.
Spills and stains should be addressed promptly by blotting rather than rubbing. For sanitation, use only a disinfectant that is confirmed to be compatible with the specific leather, and follow the required contact time without soaking the chair. After cleaning, dry the upholstery with a soft towel and allow it to air-dry completely. Apply a suitable leather conditioner sparingly when appropriate to help preserve flexibility, and maintain the chair through regular dusting, immediate spill removal, careful disinfection, and periodic inspection for cracking or wear.

 Barclay Medical