7 Tips to Upgrade an Old Dental Chair with New Accessories

Time:2026-10-15 Author:Aria
0%

An old dental chair does not always need replacement. Sometimes, it needs better support around the operator and patient.

A chair that still rises smoothly, locks securely, and supports stable positioning may offer years of service. However, worn upholstery, weak lighting, poor suction, and outdated controls can slow treatment. This is where “How to upgrade an old dental chair with new accessories” becomes a practical question, not merely a purchasing decision.

The World Health Organization’s Global Oral Health Status Report 2022 estimates that oral diseases affect nearly 3.5 billion people worldwide. That pressure makes reliable, accessible equipment increasingly important. The CDC’s Summary of Infection Prevention Practices in Dental Settings also emphasizes cleanable surfaces, safe water systems, maintenance, and effective barrier protection. Accessories must support those requirements.

Dental technology educator Dr. Paul Feuerstein states, “Technology should support clinical judgment, not replace it.” His principle matters when selecting lights, delivery arms, foot controls, suction systems, intraoral cameras, and ergonomic seating.

Small changes can feel substantial. A brighter shadow-free lamp may reduce eye strain. A quieter suction unit can improve communication. New upholstery can remove cracked seams where contaminants collect. Yet not every modern accessory fits every older chair. Electrical loads, mounting dimensions, air pressure, water connections, and manufacturer limits require inspection.

A polished upgrade plan can still overlook compatibility. That is the uncomfortable part.

The following seven tips focus on safer retrofits, practical workflow improvements, and measurable comfort. They also encourage owners to involve qualified dental equipment technicians before installation. A chair should look newer, but it must perform more reliably.
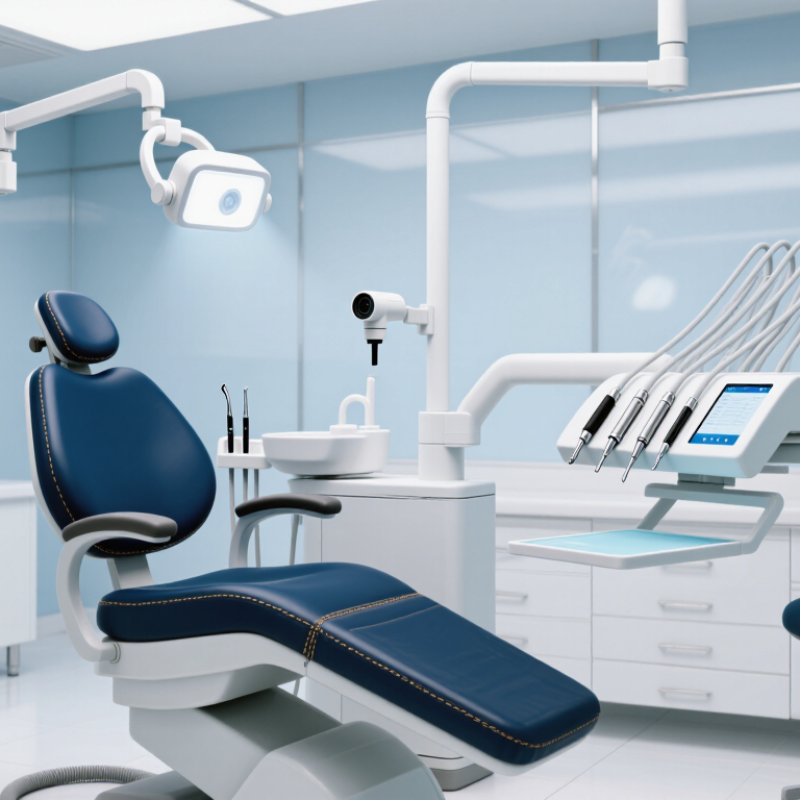
7 Tips to Upgrade an Old Dental Chair with New Accessories

Assessing the Old Dental Chair’s Condition and Upgrade Priorities

An old dental chair should not receive new accessories before a careful condition assessment. I begin with the frame, lift, recline system, and base stability. The chair must raise and lower smoothly without sudden drops or unusual sounds. A small wobble may indicate loose fasteners, worn bushings, or floor damage.

I also inspect the upholstery, seams, hoses, foot control, light arm, and water lines. Cracked upholstery can trap fluids and weaken further during daily cleaning. Brittle hoses may leak when the chair moves. Test every control several times. Check the electrical cords for heat marks or exposed wires. Safety comes before appearance. A bright new light cannot compensate for an unstable chair.

Records matter. Review maintenance notes, installation dates, and previous repairs when available. I once saw a chair that looked reliable but had a slow hydraulic leak beneath its base. It passed a quick visual check. It should not have been upgraded yet. That mistake changed my inspection routine.

Set upgrade priorities by risk, function, and compatibility. Repair structural, hydraulic, electrical, and sanitation concerns first. Then consider practical additions, such as an improved operating light, instrument tray, or foot control. Confirm weight limits, mounting points, tubing routes, and power requirements before purchase. Measure twice. Ask a qualified dental equipment technician to test the chair under normal working conditions. Some upgrades look simple, but poor fitting can restrict movement or create cleaning gaps.

Assessing an Old Dental Chair: Upgrade Priorities

Priority scores range from 1 to 5, based on patient safety, infection-control needs, treatment reliability, and the risk of operational downtime. Safety-critical and hygiene-related components should be assessed before comfort-focused accessories.

Improving Patient Comfort with an Updated Dental Chair Cushion

An updated dental chair cushion can change how patients experience an appointment. During chair evaluations, I have noticed pressure complaints often begin after twenty minutes. A thicker cushion is not automatically better. Measure the chair pan, backrest, and headrest before ordering replacement parts. The fit should remain stable when patients sit down or adjust position.

Choose medical-grade upholstery that resists fluids and repeated cleaning. A slightly textured surface can reduce sliding without feeling abrasive. Check the cushion’s firmness with different patient sizes, including older adults and children. Support under the lower back can reduce muscle tension during longer procedures. Keep the headrest adjustable, because neck comfort varies widely. Test the chair with a clinician working in a normal treatment posture.

Installation should not block controls, foot pedals, or emergency movement. Secure fasteners carefully, but avoid creating hard pressure points. Ask patients for specific feedback, such as numbness, heat, or shoulder strain. Record recurring comments and inspect seams every week. One detail I underestimated was cushion temperature after constant use. A comfortable surface may still feel unpleasant in a warm operatory. Cleaning instructions also need practical testing, not just a quick review. If the material cracks or stays damp, replace it promptly and reassess the setup. Comfort improvements are useful only when hygiene, stability, and clinical access remain reliable.

Adding Ergonomic Armrests, Headrests, and Adjustable Support Features

Upgrading an old dental chair does not always require a full replacement. In refurbishment work, small contact-point changes often improve daily comfort.

Tip 1: install height-adjustable armrests, keeping elbows close to the body.
Tip 2: choose padded supports with sealed, cleanable surfaces.
Tip 3: add a contoured headrest that supports the patient without forcing neck extension.
Tip 4: select a headrest with quick angle adjustment for children and adults.
Tip 5: check lumbar and shoulder clearance before fitting any accessory.
Tip 6: use independent controls for backrest, seat height, and leg support.
Tip 7: test every adjustment from the operator’s working position.

The details matter. A 2022 systematic review in the International Journal of Environmental Research and Public Health reported musculoskeletal symptoms among dental professionals across studies, often ranging from 64% to 93%.

Poor positioning remains a practical risk, not just a comfort issue. The U.S. National Institute for Occupational Safety and Health recommends neutral postures, balanced support, and reduced reaching during clinical work.

Measure twice. Older chair frames may have limited mounting space. I once underestimated the effect of a bulky armrest on instrument access. It looked comfortable, but restricted movement. Adjustable support should help both patient stability and clinician posture. Still, no accessory fixes an unsuitable chair height or poor room layout. Review fittings with a qualified dental-equipment technician, and inspect hinges, fasteners, and upholstery regularly.

Upgrading Lighting, Instrument Trays, and Dental Delivery Accessories

An old dental chair can remain useful when upgrades solve real workflow problems. In my retrofit experience, the best results came from measuring before ordering.

Tip one: photograph mounting points and record available voltage.
Tip two: choose task lighting with adjustable intensity, shadow control, and sealed surfaces.
Tip three: position the light so the operator’s shoulder stays relaxed. Test it from seated positions. Small changes matter.

Instrument trays deserve equal attention.

Tip four: select a tray with a stable locking arm and a load rating suited to daily instruments.
Tip five: keep frequently used tools within easy reach, while preserving clearance for the patient’s knees. Smooth corners simplify disinfection.

Do not assume every tray fits. I once overlooked a narrow mounting rail, causing an avoidable return and lost clinic time. A compatibility check would have prevented it.

Delivery accessories should support clean, predictable movement.

Tip six: inspect tubing length, connectors, air and water requirements, and control placement before installation.
Tip seven: add only accessories that staff can operate without twisting or searching.

Have a qualified dental technician verify electrical grounding, water lines, pressure, and infection-control compatibility. Run a full mock procedure with the dental team. Listen to complaints. They often reveal problems a specification sheet misses.

Keep installation records, cleaning instructions, and a replacement schedule. An upgrade is not finished when the chair turns on; it is ready when the room works safely and consistently.

Checking Compatibility, Safety, Installation, and Ongoing Maintenance

7 Tips to Upgrade an Old Dental Chair with New Accessories

Start with a complete chair inventory. Record its age, model, voltage, air pressure, water connections, and load limits. Check every accessory against the service manual, not just its connector size. A matching thread can still hide incorrect pressure or wiring. I used to treat adapters as harmless. That was too casual. Confirm electrical grounding, emergency-stop functions, backflow prevention, and movement clearance before ordering parts. Measure twice. Never bypass a failed safety switch.

Installation should follow the chair’s technical instructions and local clinical requirements. Use a qualified dental equipment technician for electrical, pneumatic, and hydraulic work. After installation, test the chair under normal patient weight. Check handpiece delivery, suction strength, lamp movement, foot controls, and unusual heat. The CDC’s 2016 dental infection-control summary recommends dental-unit water output below 500 CFU/mL, matching the drinking-water benchmark. Test waterlines when upgrading them, especially after long storage. Document the result.

Maintenance protects the upgrade. Follow a written schedule for filters, tubing, seals, lubrication, upholstery, and waterline treatment. Use biological, chemical, and mechanical sterilization monitoring where applicable. The CDC identifies these three monitoring methods for sterilizers. Keep service dates, test results, replacement parts, and technician findings in one log. WHO’s Global Oral Health Status Report 2022 highlights the enormous worldwide demand for safe oral care. That demand makes reliable equipment important, but older chairs still deserve honest assessment. If repairs become frequent, replacement may be safer and cheaper. Recheck the plan every year.

7 Tips to Upgrade an Old Dental Chair with New Accessories - Checking Compatibility, Safety, Installation, and Ongoing Maintenance

Tip Upgrade Area Compatibility Checks Safety Considerations Installation Guidance Recommended Maintenance Verification Point
1 Create an equipment inventory Record the chair model, age, available mounting points, air and water connections, electrical rating, control voltage, and tubing sizes before ordering accessories. Remove power and isolate compressed air and water supplies before opening panels or disconnecting lines. Photograph existing connections and label each hose, cable, foot control, and switch to reduce reconnection errors. Keep an updated asset record, including installation date, service history, replacement parts, and inspection results. A complete inventory should identify every connection and any missing or damaged component before modification begins.
2 Check mechanical fit and load limits Measure mounting holes, rail dimensions, arm clearance, operating height, and the available weight capacity for trays, lights, monitors, and other attachments. Do not exceed the chair or accessory load rating. Prevent attachments from obstructing patient movement, chair travel, or emergency access. Use the supplied fasteners or correctly rated replacements. Tighten evenly and check for movement throughout the full chair range. Inspect brackets, hinges, rails, and fasteners for looseness, cracks, corrosion, and deformation at least every six months. The accessory remains stable during chair movement and does not contact the patient, operator, floor, or surrounding equipment.
3 Verify electrical compatibility Compare the accessory voltage, frequency, current, connector type, grounding method, and available power capacity with the chair’s technical documentation. Use proper grounding and overcurrent protection. Never bypass fuses, protective earth connections, interlocks, or existing safety controls. Have electrical work performed by a qualified technician. Route cables away from pinch points, heat sources, moving joints, and wet areas. Check cable insulation, plugs, strain relief, switches, and protective covers during routine service. The accessory operates without overheating, nuisance tripping, exposed conductors, unusual noise, or unintended activation.
4 Match air and water systems Confirm tubing diameter, connection type, pressure range, water quality requirements, flow direction, and whether the chair has the required valves or regulators. Depressurize lines before servicing. Use materials suitable for dental water and air applications, and prevent cross-connection or backflow. Install shut-off valves where practical, secure tubing against movement, and check every connection for leaks at operating pressure. Inspect tubing for discoloration, cracking, kinks, mineral deposits, and leakage. Follow the accessory instructions for flushing and waterline treatment. Air and water delivery are consistent, connections remain dry, and no pressure drop or leak appears during operation.
5 Upgrade lighting and operator controls Check arm reach, mounting stability, control compatibility, cable routing, light positioning, and whether the chair can support the added accessory weight. Avoid glare, sharp edges, pinch hazards, and shadows across the treatment area. Ensure controls cannot be activated accidentally. Balance the light arm before final tightening and test all movement limits slowly with no patient present. Clean light covers with an approved non-abrasive product and inspect arm joints, handles, switches, and adjustment mechanisms regularly. The light holds its position, controls respond correctly, and the arm does not drift or interfere with treatment access.
6 Use qualified installation and testing Confirm that the installer understands the chair’s electrical, pneumatic, hydraulic, and control systems and has access to the correct service information. Carry out functional, electrical, leakage, stability, and emergency-stop checks before returning the chair to clinical use. Follow the accessory installation instructions, document changes, and do not modify structural parts unless the equipment manufacturer permits it. Schedule preventive service according to the chair and accessory instructions, especially after major modifications or repeated faults. A signed commissioning record confirms safe operation, completed tests, installer details, and any limitations or follow-up actions.
7 Establish ongoing cleaning and maintenance Use only cleaning agents, disinfectants, lubricants, and replacement parts that are compatible with the accessory’s materials and intended use. Follow the dental facility’s infection-control procedures. Disconnect power when required and never spray liquid directly into switches, motors, or electrical housings. Keep service areas accessible, avoid trapping cables or tubing under covers, and replace damaged protective components promptly. Perform daily surface cleaning, routine visual checks, periodic fastener inspection, leak checks, and documented preventive maintenance. The upgraded chair remains clean, stable, leak-free, electrically safe, and fully functional throughout its normal operating range.

FAQS

What should be checked before upgrading an old dental chair?

Inspect the frame, lift, recline system, and base stability. The chair should move smoothly without sudden drops or unusual sounds. Check for wobbling, loose fasteners, worn bushings, and floor damage. Safety comes before appearance.

Why are upholstery and hoses important during an inspection?

Cracked upholstery can trap fluids and worsen during cleaning. Brittle hoses may leak when the chair moves. Inspect seams, connectors, water lines, and tubing carefully. Small cracks matter.

How can electrical problems be identified?

Test every control several times. Look for heat marks, exposed wires, damaged cords, and unreliable switches. A qualified technician should verify grounding before installation. Visual checks can miss hidden faults.

What maintenance records should be reviewed?

Review installation dates, repair notes, and previous maintenance reports. Records may reveal repeated hydraulic, electrical, or sanitation problems. If records are missing, treat the chair more cautiously.

How should upgrade priorities be decided?

Address structural, hydraulic, electrical, and sanitation concerns before adding accessories. Then consider lighting, trays, and foot controls. An attractive light cannot correct an unstable base.

What should be measured before purchasing an instrument tray?

Measure mounting rails, available clearance, and patient knee space. Check the tray’s load rating and locking mechanism. Smooth corners can simplify disinfection. I once skipped a rail measurement and caused an avoidable return.

What features make an operating light suitable for an older chair?

Choose adjustable intensity, shadow control, and sealed surfaces. Test the light from seated positions. Position it to reduce shoulder strain. The best setting may feel slightly different than expected.

What must be checked before installing delivery accessories?

Confirm tubing length, connectors, air and water requirements, control placement, and power needs. Check movement limits and cleaning access. Poor fitting can create hidden gaps. That deserves another review.

How can a clinic confirm that an upgrade works properly?

Run a full mock procedure with the dental team. Test movement, controls, lighting, water lines, pressure, and electrical safety. Listen to staff complaints. They may reveal problems that specifications miss.

When is an upgrade truly complete?

It is complete when the room works safely and consistently, not merely when the chair turns on. Keep installation records, cleaning instructions, and replacement schedules. Recheck the setup after real daily use.

Conclusion

How to upgrade an old dental chair with new accessories begins with a careful inspection of its structure, upholstery, controls, electrical connections, and mechanical functions. Identify the most urgent improvements, then prioritize features that directly support patient comfort and clinical efficiency. Replacing a worn cushion can improve pressure distribution and hygiene, while adding ergonomic armrests, a supportive headrest, and adjustable positioning features can make appointments more comfortable for both patients and dental professionals.

Additional upgrades may include brighter, properly positioned lighting, a more practical instrument tray, and updated delivery accessories that improve workflow. Before purchasing any component, confirm its dimensions, mounting method, weight capacity, and compatibility with the existing chair. Professional installation may be appropriate for mechanical or electrical modifications, followed by thorough safety checks. Regular cleaning, inspection, lubrication where suitable, and timely replacement of worn parts will help preserve performance and extend the chair’s service life.

Aria

Aria

Aria is a dedicated marketing professional with a deep passion for innovative strategies and a keen understanding of our company's product offerings. With a wealth of experience in the industry, Aria excels at crafting engaging content that highlights the unique features and benefits of our......